Sunday, December 23, 2012

Magical Adventure

It's been awhile since i have been here - I feel like i have been like one of my countrymen and been on walkabout lol
I have been on a trip to see my girl 'Shani' and all the other special friends down that way. In less than 24 hours i did one Territory & 3 States of Australia pretty good going if anyone knows how big Australia is !!
God Bless Sam for driving us xxx

I was up on Helmar's blog yesterday - Helmar teamed up with Darkroom Door here's what i came up with................


checkout the details over at Helmar's Blog

until next time take care out there

Monday, October 29, 2012

Crack Crack Crackle

Hey there  from a very hot and humid Darwin, the wet season is not far off - the joys of tropical living - I love it really :-)
 
I have been playing with Helmar's Two step crackle medium to make some cards
This is how I went about it;
1. Coat a sheet of cardstock with Helmar's step 1 crackle medium and allow to dry.
2. Apply a coat of Helmar's step 2 crackle medium and allow to dry.
3. Cut, tear the desired pieces of crackle paper and start  building your cards.
4. Easy hey ?
5. I used an assortment of embellies, chippies and ink sprays to finish them off - adhereing them into place with Helmar's Acid Free Glue, 450 Quick Dry & Quickfix Adhesive Runner
6. So what are you waiting for, start crackling today - remember you can share your Helmar creations on our Facebook page we love to see what you create with our awesome products.
Here are the cards I made with my piece of crackled cardstock - I did also use another 2 sheets of plain cardstock as the base of my cards choosing to add the crackled paper on top.
 I just love the added texture that Helmar's 2 step Crackle Medium has to offer.
 nothing like tearing to add extra dimension and texture ........... look at the crackle popping!!
 Need a HELMAR fix well you can get in HERE - until next time happy Helmar Creating and take care xx

Wednesday, October 3, 2012

Best Mates!


This is my Dad & his best mate Morton. 
Morty isn't with us any longer, he had a heart condition & sadly i lost another brother :-( 
We are family of all girls, 4 of us actually & over the years we had a few brothers King Billy Coke Bottle - Billy was a stocky little fella - I remember a wedding photo of Billy and I, he was dressed in a tuxedo !! & there was Prince another little fella but hairy.
Our Brothers spoilt us with pressies & cards stamped with their paw prints, its those special things in life that make you smile - HEY ??

now for a few close-ups.........
short and sweet I know but hey that's ME!! 
until next time happy creating and take care out there...............


Monday, October 1, 2012

My Postie Rocks!!


Boiled Lollies are a winner with me & because i am such a good customer my Postie blessed me with these goodies the other day - yummo!!!

It didn't take me long to empty the tin lol........ i had plans for that tin!
So with the tin & some of this


Helmar Découpage & Craft Paste is a thick water based paste glue. Designed specifically for  most Craft applications and the bonding of  Découpage cut outs to the surface of your chosen project.
Surfaces include Wood, Ceramic, Tin, Metal, etc.
&&&& boy oh boy did it work treat...............who said treat lol !!
Lace, a Filigree Flower with some tiny roses in the centre & a touch of ink sprays added the finishing touches to my little tin.
I love this technique so much I have started a canvas bag as soon as i finish it i'll be sure to share until then take care and happy creating


Saturday, September 15, 2012

That's my Girl

 I'm not much of a LO girl but every now and then I give it a whirl............ This is my Girl - Shani 
Papers are from 7 Dots - Domestic Goddess Collection these papers are designed my Finnabair so I thought Finnabair style was the way to go - LOVE IT !!
What a cluster hey? 
Helmar adhesives are perfect for getting all this treasured junk ON !!
All these goodies are from Scrap Matrix and if you go HERE you will find out all the the goodies that I used.

thanks for stopping by until next time take care out there 


Liquid Scrap Dots = Texture!!

Hi ya - it's me Rae signing in from a very hot & humid Darwin, I think the wet season is pretty close!

I'm up on Helmar's Blog today come have a look see HERE and find out more......
'Who would have thought Liquid Scrapdots would make for such great texture'.

 Liquid Scrapdots is a huge fav of mine and my opinion it should belong in everyone's basic tool kit  you can find it HERE and I promise you, YOU wont be disappointed :-)

Until next time take care & happy scrappin'


Sunday, September 2, 2012

Momenta got me all Geared Up !!

Hi ya!
It's Momenta week here at Helmar - but i think Postman Pat kept my goodies :-( So i had to go a different direction. The Momenta team will be working with our products as well and hosting our giveaway so be sure to check in their blog and facebook page daily too and you could be a lucky winner!!
A while back i made this card 
 and a few asked how i did it - well today i have something a little different but the same effects are achieved to share with you. Grab a cuppa and sit back and see how i got my Gears on !!
I started out with a journal, took the front and back covers off , grabbed some Chippy Gears & Cogs, Mesh, Helmar's Acid Free Glue and set to work.
Here's my front cover - dont look much now but wait and see..............Helmar's Acid Free Glue works wonders getting that chippy stuck down!!
 Next apply some foil tape (i did this randomly like a patchwork effect)
 Slightly rub the foil to highlight all the chippy and mesh underneath.
I covered my inside covers with some mesh......
 then applied foil on top.
grab some texture tools and get some texture on.
  i also added some extra texture to the bare spots and chippy gears and cogs for added interest 
 You will need some acrylic paint, paintbrush and baby wipes or paper towel for the next step.
 generously paint over your entire surface, wait until it is almost dry and wipe some off .
look now the paint grabs the texture - awesome Hey?? 
&&& Wallah a Steampunk Journal - Front Cover
 Front inside - oh and the back inside looks similar too - i forgot to photograph lol
 Back Cover
 Sharing is caring right? Well here's a few extra comments from my Boys that i couldnt help but share.
Jess says "Gee mum your scrapbooking is taking a dark turn lately"
Zeb says "WOW that is so cool did you do it for me"
got to love them hey :-)
 Well that's it from me for now remember to check out MOMENTA and all their gorgeous goodies and you never know a prize may come your way!
until next time happy creating and take care xx



Thursday, August 23, 2012

It's all about bags !!

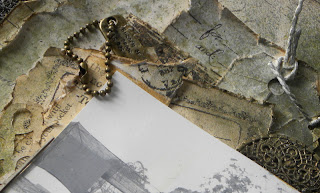
Hi Ho everyone it's Rae here today to share what i have been up to with DECOUPAGE & CRAFT PASTE (Yep it's a fav - and I bet it will be yours too). I have been using it alot lately and if you check out my blog http://illbeblessed.blogspot.com.au/ and even here on Helmar's blog you will find lots of things that I have done with this awesome product!!
Today I played with Paper bags, Tissue tape (washi tape), some Resin & Metal embellishments, Ink Sprays and a few other odds & ends and this is what I came up with.............
DECOUPAGE & CRAFT PASTE was the main glue used throughout my Paper Bag Mini Album. I did reach for PREMIUM CRAFT GLUE to secure down my Metal & Resin Embellies.
 I started out my applying Tissue Tape strips to the paper bags, these tended to lift a bit , as they arent that sticky. I coated the Tissue tape with DECOUPAGE & CRAFT PASTE, this sure did secure the tape into place and also gave it a lacquared look.


 Do you know how hard it is to photograph with one hand trying to hide those bitten finger nails from shot... here's proof as i even got the camera lense cover in the shot LOL !!!
The front and back covers started out as plain pieces of cardboard which I applied a generous amout of DECOUPAGE & CRAFT PASTE to then added lace, chippy, dew drops and metal embellies which i used PREMIUM CRAFT GLUE to adhere into place. I painted it all with gesso and used ink sprays to create some colours.
 I bounded it all together with some ribbon and DECOUPAGE & CRAFT PASTE

So there you have it A mini paper bag bound together with DECOUPAGE & CRAFT PASTE !! I can smell our dinner burning so i best be off for today. Make sure you get your DECOUPAGE & CRAFT PASTE on I would love to see what you come up with !!
Until next time take care and happy creating xx