Sunday, September 2, 2012

Momenta got me all Geared Up !!

Hi ya!
It's Momenta week here at Helmar - but i think Postman Pat kept my goodies :-( So i had to go a different direction. The Momenta team will be working with our products as well and hosting our giveaway so be sure to check in their blog and facebook page daily too and you could be a lucky winner!!
A while back i made this card 
 and a few asked how i did it - well today i have something a little different but the same effects are achieved to share with you. Grab a cuppa and sit back and see how i got my Gears on !!
I started out with a journal, took the front and back covers off , grabbed some Chippy Gears & Cogs, Mesh, Helmar's Acid Free Glue and set to work.
Here's my front cover - dont look much now but wait and see..............Helmar's Acid Free Glue works wonders getting that chippy stuck down!!
 Next apply some foil tape (i did this randomly like a patchwork effect)
 Slightly rub the foil to highlight all the chippy and mesh underneath.
I covered my inside covers with some mesh......
 then applied foil on top.
grab some texture tools and get some texture on.
  i also added some extra texture to the bare spots and chippy gears and cogs for added interest 
 You will need some acrylic paint, paintbrush and baby wipes or paper towel for the next step.
 generously paint over your entire surface, wait until it is almost dry and wipe some off .
look now the paint grabs the texture - awesome Hey?? 
&&& Wallah a Steampunk Journal - Front Cover
 Front inside - oh and the back inside looks similar too - i forgot to photograph lol
 Back Cover
 Sharing is caring right? Well here's a few extra comments from my Boys that i couldnt help but share.
Jess says "Gee mum your scrapbooking is taking a dark turn lately"
Zeb says "WOW that is so cool did you do it for me"
got to love them hey :-)
 Well that's it from me for now remember to check out MOMENTA and all their gorgeous goodies and you never know a prize may come your way!
until next time happy creating and take care xx


Thursday, August 23, 2012

It's all about bags !!

Hi Ho everyone it's Rae here today to share what i have been up to with DECOUPAGE & CRAFT PASTE (Yep it's a fav - and I bet it will be yours too). I have been using it alot lately and if you check out my blog http://illbeblessed.blogspot.com.au/ and even here on Helmar's blog you will find lots of things that I have done with this awesome product!!
Today I played with Paper bags, Tissue tape (washi tape), some Resin & Metal embellishments, Ink Sprays and a few other odds & ends and this is what I came up with.............
DECOUPAGE & CRAFT PASTE was the main glue used throughout my Paper Bag Mini Album. I did reach for PREMIUM CRAFT GLUE to secure down my Metal & Resin Embellies.
 I started out my applying Tissue Tape strips to the paper bags, these tended to lift a bit , as they arent that sticky. I coated the Tissue tape with DECOUPAGE & CRAFT PASTE, this sure did secure the tape into place and also gave it a lacquared look.


 Do you know how hard it is to photograph with one hand trying to hide those bitten finger nails from shot... here's proof as i even got the camera lense cover in the shot LOL !!!
The front and back covers started out as plain pieces of cardboard which I applied a generous amout of DECOUPAGE & CRAFT PASTE to then added lace, chippy, dew drops and metal embellies which i used PREMIUM CRAFT GLUE to adhere into place. I painted it all with gesso and used ink sprays to create some colours.
 I bounded it all together with some ribbon and DECOUPAGE & CRAFT PASTE

So there you have it A mini paper bag bound together with DECOUPAGE & CRAFT PASTE !! I can smell our dinner burning so i best be off for today. Make sure you get your DECOUPAGE & CRAFT PASTE on I would love to see what you come up with !!
Until next time take care and happy creating xx
Sunday, July 22, 2012

I'm off on Holidays !!

A very short post but a goody for me lol - One more sleep and im up, up and away ..... woo hoo been hanging for this holiday for awhile now. I have had some busy times of late so all the relaxing, sun, food and cocktails coming my way will be awesome and I will return refreshed....... well thats the plan lol !!!!

As I leave you for a few weeks - I wanted to share this journal with you. I created it for a special girl who is turning 18 - today actually - Happy Birthday Latoyah xxx

 Finnabair style with lots of Helmar goodies...................
front inside cover
 back inside cover
back cover

sorry not time to tell you more..... only pics today !!
have a wicked time - im pretty I will be!!
take care until next time

Sunday, July 15, 2012

Mr Squiggle

Mr Squiggle & my son Jess were my inspiration today! I used to love watching Mr Squiggle when i was a little girl - loved Mr Blackboard too hehehe...... & I often find Jess with miniature pencils, I am unsure if its a fascination with the pencil sharpen or just the fact he likes tiny pencils. Is this a boy thing I wonder ???
How cute is Mr Squiggle?? 
Here's my inspirational Faber Castell & Helmar Journal
  i started out with canvas journal covers, torn pieces of paper and Helmar's Decoupage Glue
 I'm a little addicted to Helmar's Decoupage Glue of late i find it so easy to use and love the clear drying factor.
 I glued away until both front and backs were covered, then added some Tim Holtz Tissue Tapes (this was an after thought once doing the inside covers to tie it all together) On the inside I made pockets from envelopes and covered them with Tim Holtz Tissue Tapes and sealed them with Helmar's Decoupage Glue.
 the next is our little secret OK ??? ssshhhhh dont tell Faber Castell that i am a wrecker lol......
 How cool do these look ??

I glued the Faber Castell Pencils down with Helmar's 450 Glue, took some shavings and placed them around each colour while Helmar's Decoupage Glue was still a tad wet this let them stick where i needed them. I grabbed a piece of ruler ribbon and attached it to a piece of chippy to add strength with Helmar's Acid Free Glue. For my next trick i took Helmar's Antique Acrylic Sealer and sealed the front and back covers completely - its a great satin look with a vintage feel to it !!
but wait there's more.................
I had another little helper too - Meet Ab - she is 2 and a bit and loves to draw so when she spied all my Faber Castell goodies she wanted to play !!
 and here is Ab's master piece - the first page in my journal.

thanks for stopping by - remember to keep my secret lol.
until next time take care and happy creating

Friday, July 6, 2012

Playing with Epiphany & Helmar


We have team up with Epiphany Crafts and i got to play with these gorgeous products


 They are so easy to use and the list is endless of what you can create. 
I have a tag to share with you incorporating these gorgeous products and Helmar Adhesives.
 I used Pion Design Papers - Studio of Memories as the base papers and layers and then fussy cut some flowers. The flower centers are pearls adhered with Gemstone Glue.
.
I put the stickers Love You (not to straight mind you lol) on some paper and used the Shape Studio Tool Oval 25 & Shape Studio Accessories Bubble Caps Oval 25 along with some Gemstone Glue to bring to life my 'LOVE YOU' .
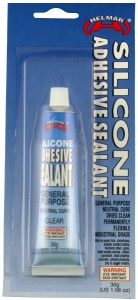
To add dimension I used Silicone Adhesive/Sealant this works along the same lines as  Liquid Scrap Dots so if you cant find one of them the other will do the same magic :-)
LOOK - how great is that dimension and solid too - love it !!
it adds that special touch don't you think?


That's it from me for now until next time take care and happy creating


Tuesday, July 3, 2012

Helmar Red White and Blue Hop


Hello everyone and welcome to the Helmar Red White and Blue Hop. We have a bunch of wonderful projects to share with all of you and wanted to celebrate the colors of our design team with you. Australia, Canada and America are shining brightly, so grab a glass of your favorite beverage and lets get hopping.

If you get lost along the way, you will find the order below. Make sure you leave your comments on every stop for your chance to win. We will select 1 Canadian, 1 American, and 1 Australian individual. So that is 3 prizes total. Now lets get hopping.

If you are hopping along you should have come from Susan's blog .........

Aussie Aussie Aussie Oi Oi Oi yep you guessed it I'm an Aussie...... I was rather excited about this hop and thought yeah i can do this and i can do that... then realised everything was in storage  :-(
So the thinking cap went on and off again, DH added his suggestion  'why don't you do up my esky thats real Aussie'  Yep a great suggestion  (god love him) but what he didn't realise was i left it to the last minute (too busy entertaining our guests from down south) and the time factor wasn't there .... oops.............

With all this in mind and time running away from me i reached for my Premium Craft Glue, some washi tape, flowers, mists and altered this plain white tin in about 10 mins, tied this little Aussie Tin to it - how's that for quick.  Premium Craft Glue is a great all rounder from sticking paper to paper, paper to metal and metal to metal it does the trick every time. So when your running a little late and want to add your little touch Helmar's always be there to save your day!!


  Thanks so much for stopping by don't forget to leave your comment for your chance to WIN!
Now head on over to JJ's blog and see what she has been up too.
 Have fun and good luck with the prizes up for grabs..........................
Got to LOVE that Helmar goodness !!
Until next time take care


Helmar Blog
Erin


Thanks for spending a little bit of your weekend with Helmar. Enjoy